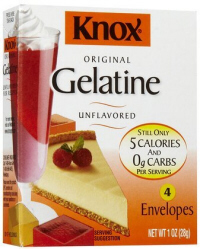
Strip It Off! DIY Pore Strips
This recipe for DIY Pore Strips or Pore Strip Alternative using Knox gelatin, is one of our most popular Spa DIY tricks. We were delighted to see it pop up on blogs and then all over Pinterest, but sadly, the origins have long ago been lost. Where did it originate? Right here on our spa directory, SpaIndex.com: Guide to Spas, with our staff esthetician, in April 2004. It remains an oldie but a goodie. — 2015
Strip It Off! Homemade Pore Strips
Materials
- 1 tablespoon Knox unflavored gelatin
- 1-1/2 tablespoons milk
Instructions
- Mix two ingredients and microwave for 10 seconds to very slightly warm.
- Allow to cool again, and, using a clean cosmetic brush, apply to nose and chin area. Avoid delicate eye area. Rinse brush immediately.
- Allow mixture on nose and chin to dry for 10-15 minutes.
- Mixture will dry quite stiff and form a "film."
- Peel off the film and stare at all the little porcupine quills that used to be in your nose pores (one of the chief entertainment factors with B'Strips!).
Website Feedback from readers who tested this recipe (which first appeared on SpaIndex in April 2004):
I love this Pore Strip recipe! It works great! You just have to get over the smell and finish a few hours before any important dates, etc because it leaves your face kinda red for a while! LOL! — Emma M., Feb 2011
Just wanted to share my recent success with this simple recipe for natural pore cleaning. Hope someone finds it helpful! My additions: I used the plastic spatula from my waxing kit for application as it is much easier to clean than a brush. Also this recipe makes quite a bit, even if you wanted to do your entire face. I would start with a smaller amount (perhaps teaspoons instead of tablespoons), keeping the “1 to 1.5 ratio” and then you can always make a second batch if need be. Also the warm milk smell might not be pleasant to all noses. Happy stripping! — Katrini @ LiveJournal 2007
Great Advice, thank you! — Ed.
Just wanted to comment on your Strip it off! Pore cleansing recipe. I really like it, I just wanted to recommend adding 2-3 drops of pure tea tree oil for the added antibacterial tingle. Lovely recipe I shall be using this and your other recipes often. Thanks for posting them! — Meagan Bagley, British Columbia 2006
Fantastic idea; but we’re curious if the product sets up as easily, with the addition of Tea Tree Oil? — Ed.
So I finally got around to trying it and oh boy! It’s very sticky and dried very stiff. I was kind of fun just to make a silly face and feel it crack after it dried. (I put it on my nose and chin.) It felt a bit like pulling a band-aid off very slowly. It was THAT sticky. I didn’t have a makeup brush to put it on with, so I used my fingers. So it probably went on a bit thicker than it’s supposed to be. Overall, I didn’t notice very much difference. But my blackheads have been much less visible and greatly diminished since I have been regularly doing OCM. So I don’t know if there was much there to pull out. I didn’t see “little porcupine quills” on the strip when I pulled it off. I wouldn’t mind trying it again if I have a big visible blackhead or 2 (or 3 or 10…:lol). But I don’t think it will be a regular thing. But very cost-effective alternative! An hour later…. Hmmm, if possible my pores seem even more blackhead free. Since I previously posted *5 minutes* after I tried this, maybe I hadn’t given my pores a chance to close more. :grin: Okay, I think it’s worthy. Still not a regular thing, more once-in-awhile. But combined with OCM, pretty fab. And still cost-effective! — Loon13, December 27, 2005


I first found this DIY Pore Strips on your site in about 2005 I think? I’ve been making it for years. Works fine for me. Not QUITE as stiff and useful as the purchased product, but well worth the effort if you have a lot of teens obsessed with blackheads.
you will be left with smoother and clearer skin. Just like other products, not every blackhead mask is the same.
Pretty nice DIY tip. It’s been shared hundreds of times on pinterest and DIY blogs but this is the first website where I ever saw it something like 15 years ago! It actually works pretty darn well!
I traced this ALLLL the back to you guys! Thanks for coming up with this, whoever first tipped you off, it’s weird that it works. Nice to use it when the stores are closed these days.
Question: Would you recommend doing this before OR after a face wash/mask? Looking to do it as a spa day with the kiddos. Thanks!
Great question. Our staff esthetician recommends you do this BEFORE a mask — and preferably a calming mask and very gentle wash which will help reduce redness and close any newly opened pores. No harsh exfoliants or astringents just yet.